
Should I stay or should I go?
|
If I go there will be trouble… …and if I stay it will be double. |
 |
Sometimes it’s better to carry on than stop.
I’m not suggesting that anybody should run a red light; that would be irresponsible, dangerous, and illegal. However, imagine that you are approaching an intersection at a reasonable (legal/safe) speed, and just before you pass into the intersection, the lights change from green to amber. You have two choices:
Carry on (or even accelerate slightly to make sure you clear the junction safely).
Slam on the brakes and attempt to stop.
Slamming on the brakes might be pretty dangerous. If you’ve got great brakes, and the people on your rear were not paying attention, (or were following too closely), there’s a good chance you’ll get rear ended (or pushed into the junction from behind).
If your brakes are not too good (or even if they were and you were almost at the junction), you’ll not be able to stop before entering the intersection. You may end up, stopped, blocking the junction and risk being T-boned by orthogonal traffic, or dangerously roll-through at an ever decreasing speed.
Depending on your speed and distance from the intersection at the light change, you might decide it is safer to continue on rather than attempting to stop. This is not dangerous, it’s the correct thing to do, and it’s why there is an amber light in the sequence. If lights transitioned digitally from red to green with no hysteresis, everyone would have a really bad day.
Aircraft
Here’s a related problem. Imagine you are in an aircraft and in the middle of your take-off roll down a runway. Part way through this run your engine stops. What should you do?

If you are in a single engine aircraft, you don’t have much choice! You’re going to stop. (And be thankful the engine failed whilst you were still on terra firma). However, if you are in a multi-engined aircraft it’s not so simple.
Imagine you’ve just started your take-off roll and travelling at a low speed. If an engine fails at this point it’s not hard to abort. Even with a heavy (fuel laden) aircraft, the application of brakes (and possibly reverse thrust with the surviving engines), should be able to stop your plane in a short distance.


|
Conversely, attempting to continue the take-off run with a failed engine at low speed would greatly lengthen the take-off distance required. If you typically have n engines, and one fails, now you have just (n-1)/n the usual thrust. (Actually, there is a good chance it is worse than that as, unless the failed engine happens to be on the center-line of the aircraft, there is now asymmetric thrust attempting to yaw the plane, requiring the pilot to apply rudder to keep things straight; increasing the drag and pointing the thrust vector away from the runway). A damaged engine might also impose windmill drag. It will take more runway to achieve a safe take-off speed with one less engine. |
|
Now let’s look at the other extreme. Imagine that we’re just a couple of knots away from getting into the air when an engine fails. Now, even with reduced thrust, we’ll probably still be able to get into the air; sure it will take a little longer than planned, but hopefully not too much longer. |
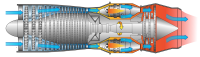 |
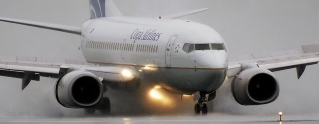 Image: Bernal Saborio Image: Bernal Saborio |
Contrast this with applying brakes at close the take-off speed. An aircraft close to take-off is travelling pretty fast, and it’s probably very heavy with a full fuel load. It might take quite a long time (long distance), for the brakes and reverse thrust to slow the plane to a stop (far longer than a typically landing roll because of the full fuel load). If an engine fails late on in take-off, it might be ‘better’ to continue the run. |
What does ‘better’ mean in this context? Better means shorter.
Distances
Let's go through this with a take-off example. You release the brakes and your aircraft accelerates down the runway as per usual.
Then, at some point in the roll you experience an engine failure. It will take you a couple of seconds to comprehend this and determine your strategy. During this time you are still accelerating down the runway.
After a decision is made, action is taken, and there are two options: You reject the take off, or continue on. Both of these cases are represented by the bar shown in red below.

The pilot should take the decision that would result in the shortest overall total distance. There is a certain point where the two distances are equal (It will take the same distance to reject as it will to continue).
Whatever the outcome, we know that the plane can stop/depart within this distance, so as long as the plane is operating from a runway at least this total length, and the pilot behaves rationally, we will have sufficient runway.
|
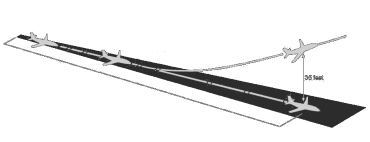
For a successful take-off, the plane needs to leave the ground and clear a potential 'obstacle' at the end of the runway at height of 11m (approx 35ft).So, for continuing the take-off, the horizontal distance is based on the distance required to accerelare, rotate and unstick, then successfully climb to 11m; all after allow 3 seconds for the pilot to react. |
The total distance required (with either a rejected take-off or continuation with engine failure) is called the Balanced Field Length. Regulations require that aircraft operate from runways that have at least this distance available.
Graphs
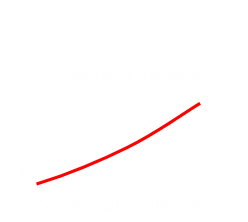 |
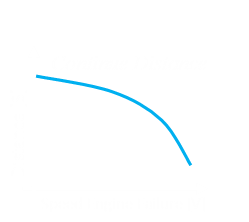
The curve on the left represents the stopping distance based on speed. The higher the speed on engine failure, the longer the distance needed to stop. There's signficantly more energy to dissipate as the speed gets higher. |
 |
This curve represents the distance covered on the runway if the pilot elects to continue on with an engine failure. This is based on failure of the most 'critical' engine (the worst case scenario; typically losing an outboard engine as this produces the greatest asymmetry of thrust). The faster the speed before the engine failure, the less distance there is to run. The slower the speed, the longer the distance needed. |
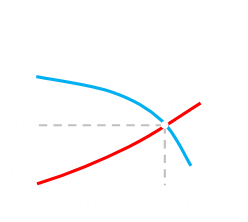 |
Overlaying these two graphs shows an inflection/cross over point. This is given the term V1. Below this speed, it is shorter to stop, so until this speed is obtained, an engine failure should call for an abort. Above this speed, it is better to carry on. Even with the engine failure, it will take less distance to continue the take-off than to attempt to brake. |
|
Converting all these calculation to a decission speed greatly simplifies the evaluation for the pilots. If an engine fails before this speed, then stop. If an engine breaks after this speed, then continue. Before take-off the pilots will calculate the exact value for V1 for each upcoming take-off based on aircraft weight, configuration, and current enivornmental conditions. One of the pilots will then fly the take-off (steering the plane down the center line), and the other will call out the airspeed as it increases. Once V1 is called, they know they will be continuing the run. |
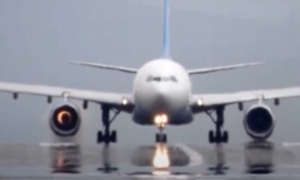 Image: NYC Aviation Image: NYC Aviation
|
Calcuations
It's a fun exercise to estimate the basic take-off performane of an aircraft; we'll ignore engine failures from this point on! Typically these calculations are performed with time step integration, but we can get some approximations by making some simple assumptions.
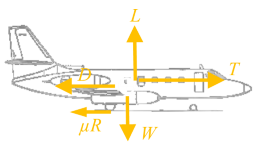 |
First of all we need to look at the forces acting on the plane. In accordance with Newton's Laws, forces cause acceleration. In the horizontal axis, the engines are thrusting the plane forward. Counteracting this is aerodynamic drag and ground/wheel/friction. In the vertical axis there is the lift generated by the wings, and pulling it down is gravity. Many of these forces vary by speed, so we'll need to dig out some calculus and perform some integration. |
We'll next break the take-off into three basic phases; Ground roll, transition, initial climb-out.
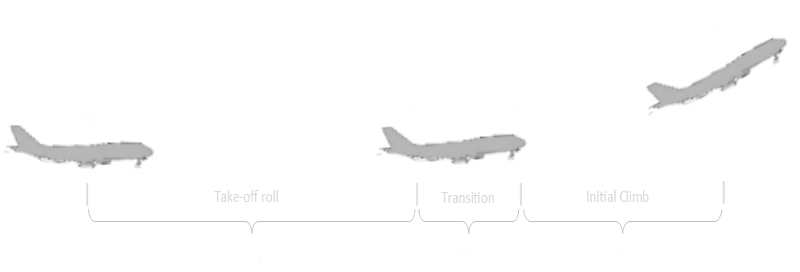
The ground roll is the initial part of take-off as the plane is accelerating down the runway. The transition is the unstick point where the aircraft rotates and leaves the ground. Finally, the initial climb-out is the shallow climb up to the imaginary 11m obstacle described earlier.
Ground roll
From Newton, the rate of change of momentum of a body is proportional to the net exterior forces acting. We're going to assume the change in weight of the aircraft during the take-off (from fuel consumption) is negligable compared to the aircraft's gross weight. With the mass staying constant, the acceleration is directly proporational to the forces.

In the horizontal plane the forces acting are the thrust, drag, and the retarding friction force at the wheels. The friction force is dependent on the reaction of to the ground, which is the difference between the static weight of the aircraft and the current lift being generated.

We want to calculate the total distance, so a little rearrangement will give the rate of change of velocity with respect to distance.

The thrust, drag, and lift change with respect to velocity, so we can expand these terms. Jet engines produce the most thrust when static T0, and as speed increases it gently falls proportional to speed squared. Aerodynamic drag is proportional to speed squared also (CD being the drag coefficient of the aircraft in take-off configuration; gear down, take-off flap selected …), similarly for Lift.
The value for the lift coefficient is going to be higher from that of a similarly configured aircraft in free stream conditions because of ground effect (Too detailed to go into here, but the ground below the aircraft stops the air deflected by the wings continuing downwards and it acts like a cushion, improving their efficiency).

(In the above equation, uppercase S is the wetted area, lowercase s is distance, μ is the air density, and τ describes how thrust reduces from static based on speed).
Things are starting to get messy, with lots of coefficients. For the interests of this analysis we can simply say that there are some terms on the left-hand side that are constant, and some terms that are proportional to v2

Where:

Rearrangement allows for integration:

We now have an equation for the length of the take-off roll based on the unstick speed. To allow for a margin of safety, and to buffer against wind gusts, typically this will be 1.1–1.2x of stall speed.
Transition
During the transition phase there is no contact with the runway, so the μ(W-L) term disappears. If we make the assumption during this transition period that (T-D) is approximately constant, then the acceleration term is a very simple (T-D)/(W/g), and this is also constant.

During the transition, the plane unsticks and accelerates to a safe climb speed.
Initial climb out
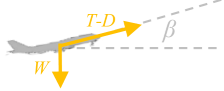 |
After transition, the approximation is that plane uses all the energy and thrust to achieve altitude, climbing at constant speed. It's not accelerating. We'll approximate the flight path as a straight line (in reality, it's a smooth curve), and we can calculate the gradient of this climb β because the forces are balanced. |

Where H is the height of the virtual obstacle to get over.
An approximate estimate of the take-off distance can be calculated by summing up these three distances.

Optimizing: A & B
Bonus geek content. How do we optimize A & B for the most efficient take-off?
From above, it’s clear that to maximize acceleration (get to the shortest take-off distance), we want to maximize both A and B. We can make A higher by improving the Thrust-to-Weight ratio of our aircraft, and reducing rolling resistance on the runway (for instance taking off on a smooth runway vs. a grass runway).
For B, it’s a little more complicated; the only parameters we have control over are the drag coefficient and lift coefficient, and so we want to maximize this term:

The drag coefficient has a static component and a lift-induced component (where CD0 is the static drag coefficient, AR is the aspect ratio of the wing, and k is a lift induced drag coefficient):

Substituting this back in, differentiating, and equating this to zero allows us to find the turning point (maximum value).

For the most efficient take-off, we want to reduce drag as much as possible (making the aircraft as aerodynamically clean as possible, setting CD0 as small as possible), and the optimal lift coefficient to aim for is given by the equation above.
Flaps or no Flaps?
Using flaps reduces the stall speed of the aircraft. As seen above, the take-off distance depends heavily on stall speed (it dictates when the pilot unsticks the plane). Flaps are therefore good for reducing the take-off rolling distance. However, the use of flaps increases drag (and thus reduces climb performance), so it's a trade off.
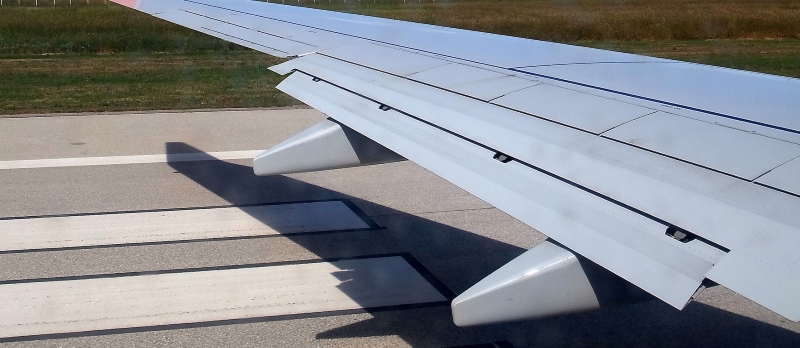 Image: George Redgrave
Landing Performance
With some slight modifications, it's easy to see how these calclulations ban be reversed to determine landing performance. There's addtional forces in play (brakes) and signficantly more flaps are used in the approach (slowing down further the approach speed, which results is a steeper approach gradient).
You can find a complete list of all the articles here. Click here to receive email alerts on new articles.

© 2009-2016 DataGenetics Privacy Policy